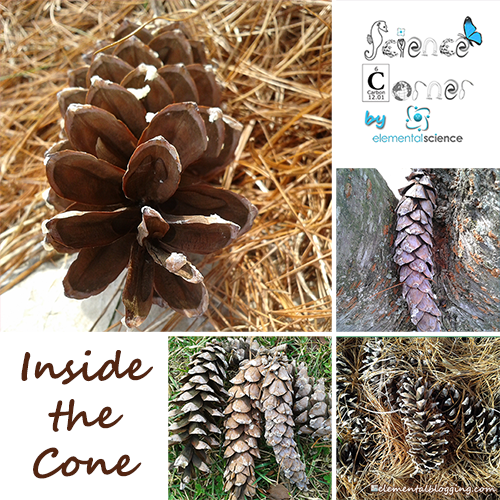
The fruit of the conifer tree, also known as a cone, can open and close on its own. This incredible ability makes it quite an entertaining study! In this homeschool science corner, I’m sharing more these amazing cones along with a FREE printable and several activities.
What is a cone?
A cone is the dry fruit produces by a conifer. In other words, it is a reproductive structure of that type of plant, but did you know that there are both male and female cones? Both have scales, but they differ in color and firmness.
The male cone is typically soft, green, and small. In fact many of us never even notice it, but it is very important. The male cone produces the pollen for the conifer tree and without it, the seed would not be able to develop.
Under each of the scales of this cone is a sac that contains a yellow powder known as pollen. When the conditions are right, the male cone will open, the wind will disperse the fine particles, and some of the pollen will reach female cone to fertilize it.
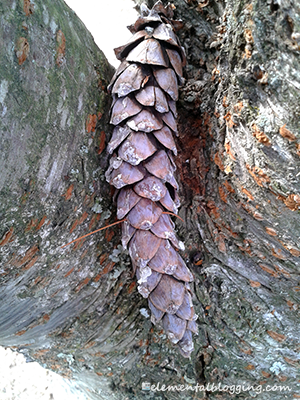
The mature female cone is typically larger, harder, and brown in color. It is what we normally call a pine cone, but did you know that even these cones typically start out soft and green? Once the seed is fertilized, the female cone darkens and hardens as the seed matures. This process can take a year or more to occur.
As the seed matures inside the female cone, a type of glue called resin helps the scales remain tightly closed. When the temperature and humidity are right, the cone will open and the seeds will be dispersed by the wind.
There are many different shapes and sizes of cones and each is specific to the type of tree from which it comes. Scientists are able to use the female cone as a means of identifying a conifer tree.
Looking inside the cone
 One of the ways students can learn more about the cone is through a hands-on examination of what these seed-delivery structures can really do. For this, you will need:
- Tightly closed female pine cone (Note: It is best to pick one off the tree before it has fallen because the seeds will still be in there, but this scientific demonstration will still work even if you can’t find one like that.)
- Magnifying glass
- Access to an oven
- Bowl of water
Begin by having the students examine the pine cone. Is it hard or soft? Is it sharp or dull? Is it sticky or smooth?
Next, gently heat the pine cone at a very low heat (300 degrees) in the oven until the scales open up. This should take less than five minutes. Let the pine cone cool before removing it.
Then, have the students, observe the pockets of space where the seeds normally rest. If there is a seed in the opening, take it out and examine it.
Finally, have the students place the same pine cone in a glass of water and observe what happens. (They should see that the pine cone closed back up after several minutes.)
Discuss with the students what they have learned about the pine cone as well as what the right temperature and humidity are for the seeds to be released. (Remember that the seeds are dispersed by the wind, so the most favorable conditions will allow the seed to travel farthest before it lands and germinates. This is why the cone is designed to open and release its seeds when the weather is warm and dry.)
If you would like to have the student complete a lab report sheet for this, you can download the one below for free.
- FREE Printable ~ Lab Report: Inside the Cone
More activities
Here are several activities you can use to explore the cone even further: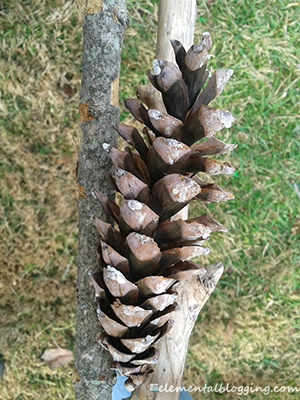
- Pine Cone Race — Have each student collect a pine cone and two sticks. Then, have each of them use the two sticks to carry the pine cone as they compete in a race!
- Pine Cone Bird Feeder — Have the students make a bird feeder from a pine cone. You will need string, peanut butter, and bird seed. Begin by tying string to the top of the pine cone so that it will hang on a branch. Then, slather the outside of the pine cone with peanut butter. After that, roll the cone in bird seed and hang it outside for the birds to enjoy.
- Porcelain Pine Cones — In this post from the DIY Project Network, the author shares about how to dip a pine cone in paint to create a porcelain-like effect. You will need a pine cone, high gloss paint, and glitter. This activity is fun, but very messy, so you definitely want to do it outdoors!
- Pine Cone Hunt — Take the students on a nature walk to look for different kinds of cones. When you find one, take a picture of the tree from which it came. After you get home, use the cones and pictures to identify the conifer trees you found.
Here are a few books you can read with your students about cones:
- From Pinecone to Pine Tree by Ellen Weiss
- Penguin and Pinecone by Salina Yoon
I hope that you find the above information useful as teach about cones in homeschool science. If you have any questions or have an activity to add, please feel free to leave a comment below!


Thank you for this post! We are studying Christmas trees during Advent and this will go along with our science readings!!
Cassie,
I so glad that you found this to be useful! It does sound like it will dovetail very nicely with what you are already planning to do :-)!